
What you can do
- Create walk-in and scheduled repair intakes.
- Record the customer, device, IMEI, damage, issue, approval, technician, parts, and services.
- Move a repair through processing, waiting for parts, QA, ready, and completion states.
- Collect payment and print the repair invoice or ticket from reachable repair entry points.
Find the exact task
How do I create a repair intake?
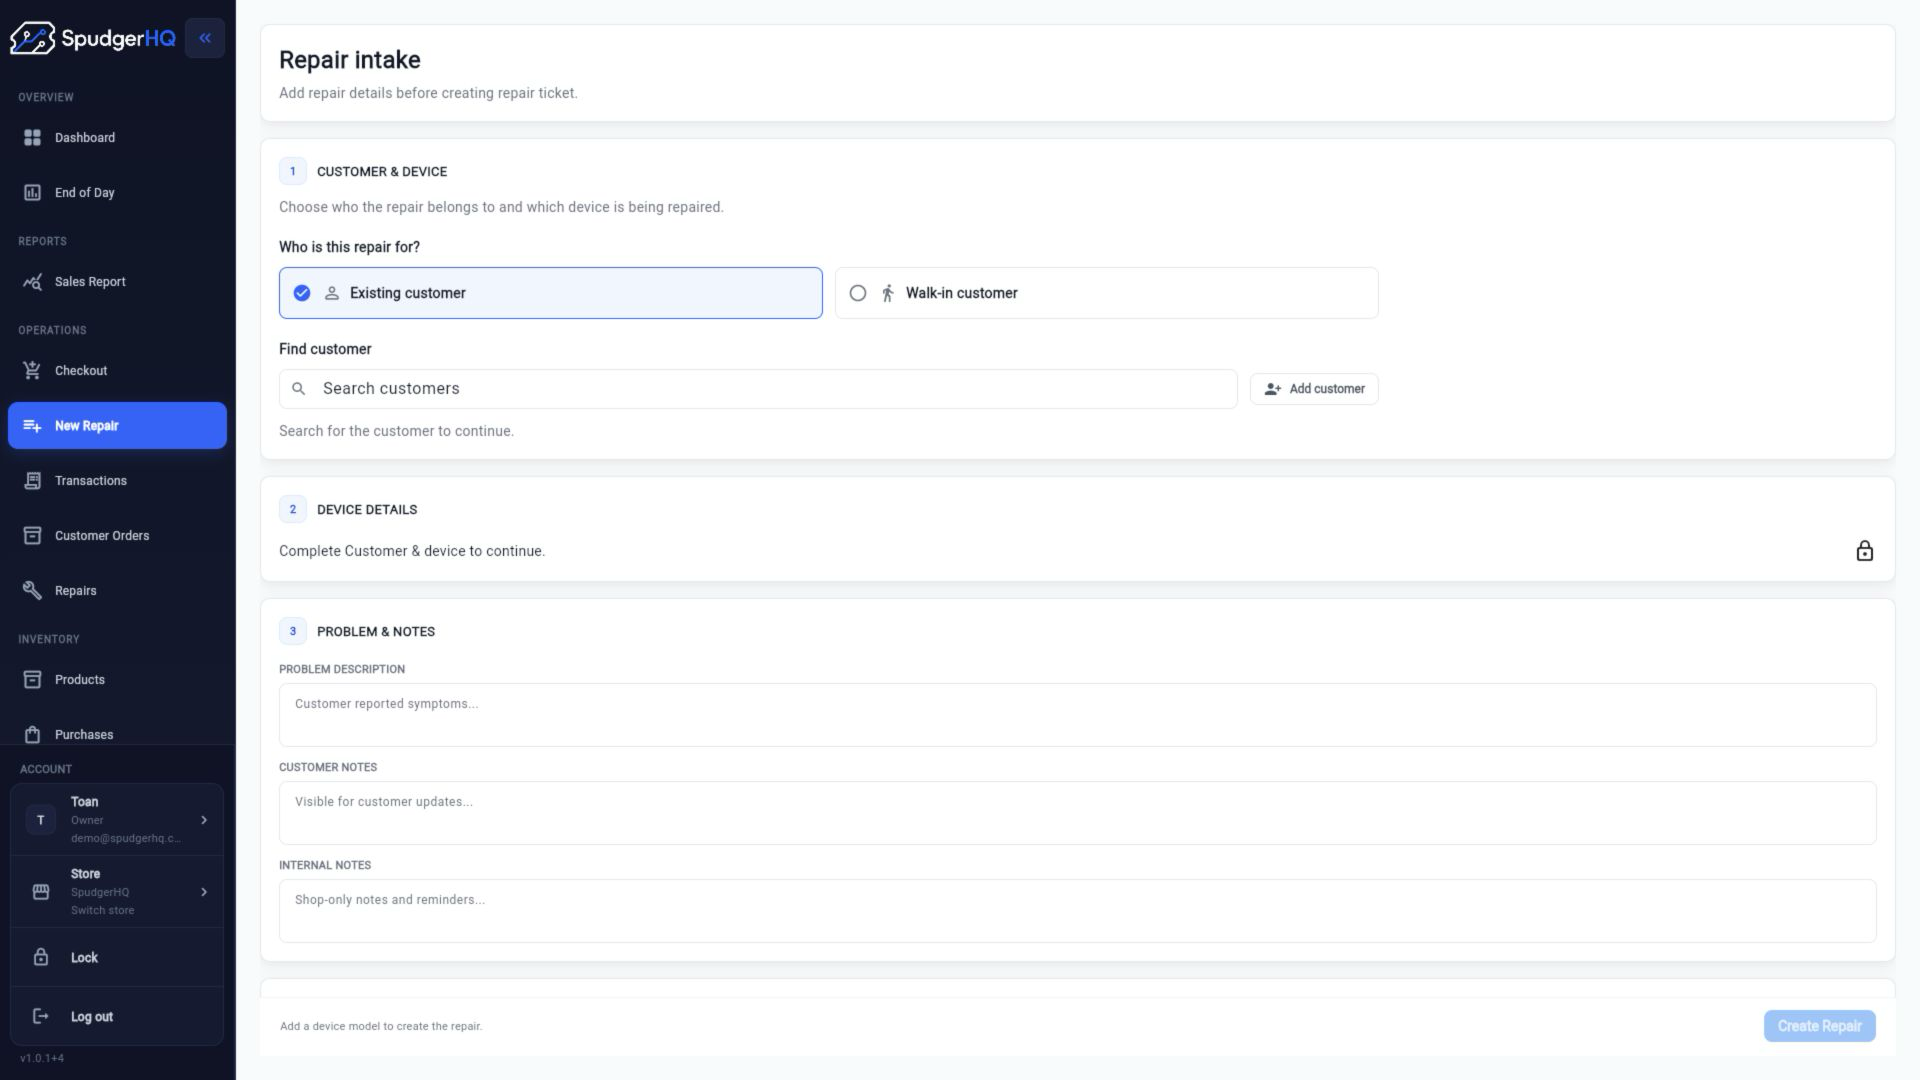
Open Repairs → Create, select or add the customer and device, capture the issue and condition, then save the intake.
- Open Repairs and choose Create Repair.
- Select or create the customer and device.
- Record the issue, condition, approval context, and save.
How do I create a walk-in repair?
Start a new repair from the Repairs area, choose the walk-in intake flow, and capture the customer, device, issue, and condition at the counter.
- Open Create Repair.
- Choose the walk-in intake option when shown.
- Complete the intake fields and save the job.
How do I add a customer device?
Select an existing device from the customer record or add a new device during repair intake, then enter its identifying details.
- Open the customer or repair intake.
- Choose Add Device.
- Enter the device model and identifier details, then save.
How do I find a device by IMEI?
Use the device search field exposed by the customer or repair workflow and enter the IMEI to find the matching device record.
- Open the device selector or repair intake.
- Search using the IMEI.
- Choose the matching device and confirm the customer context.
How do I record device damage?
Capture visible damage and condition notes during intake so the customer and technician share the same starting record.
- Open the repair intake.
- Use the condition and damage fields.
- Review the notes with the customer before saving or requesting approval.
How do I assign a technician?
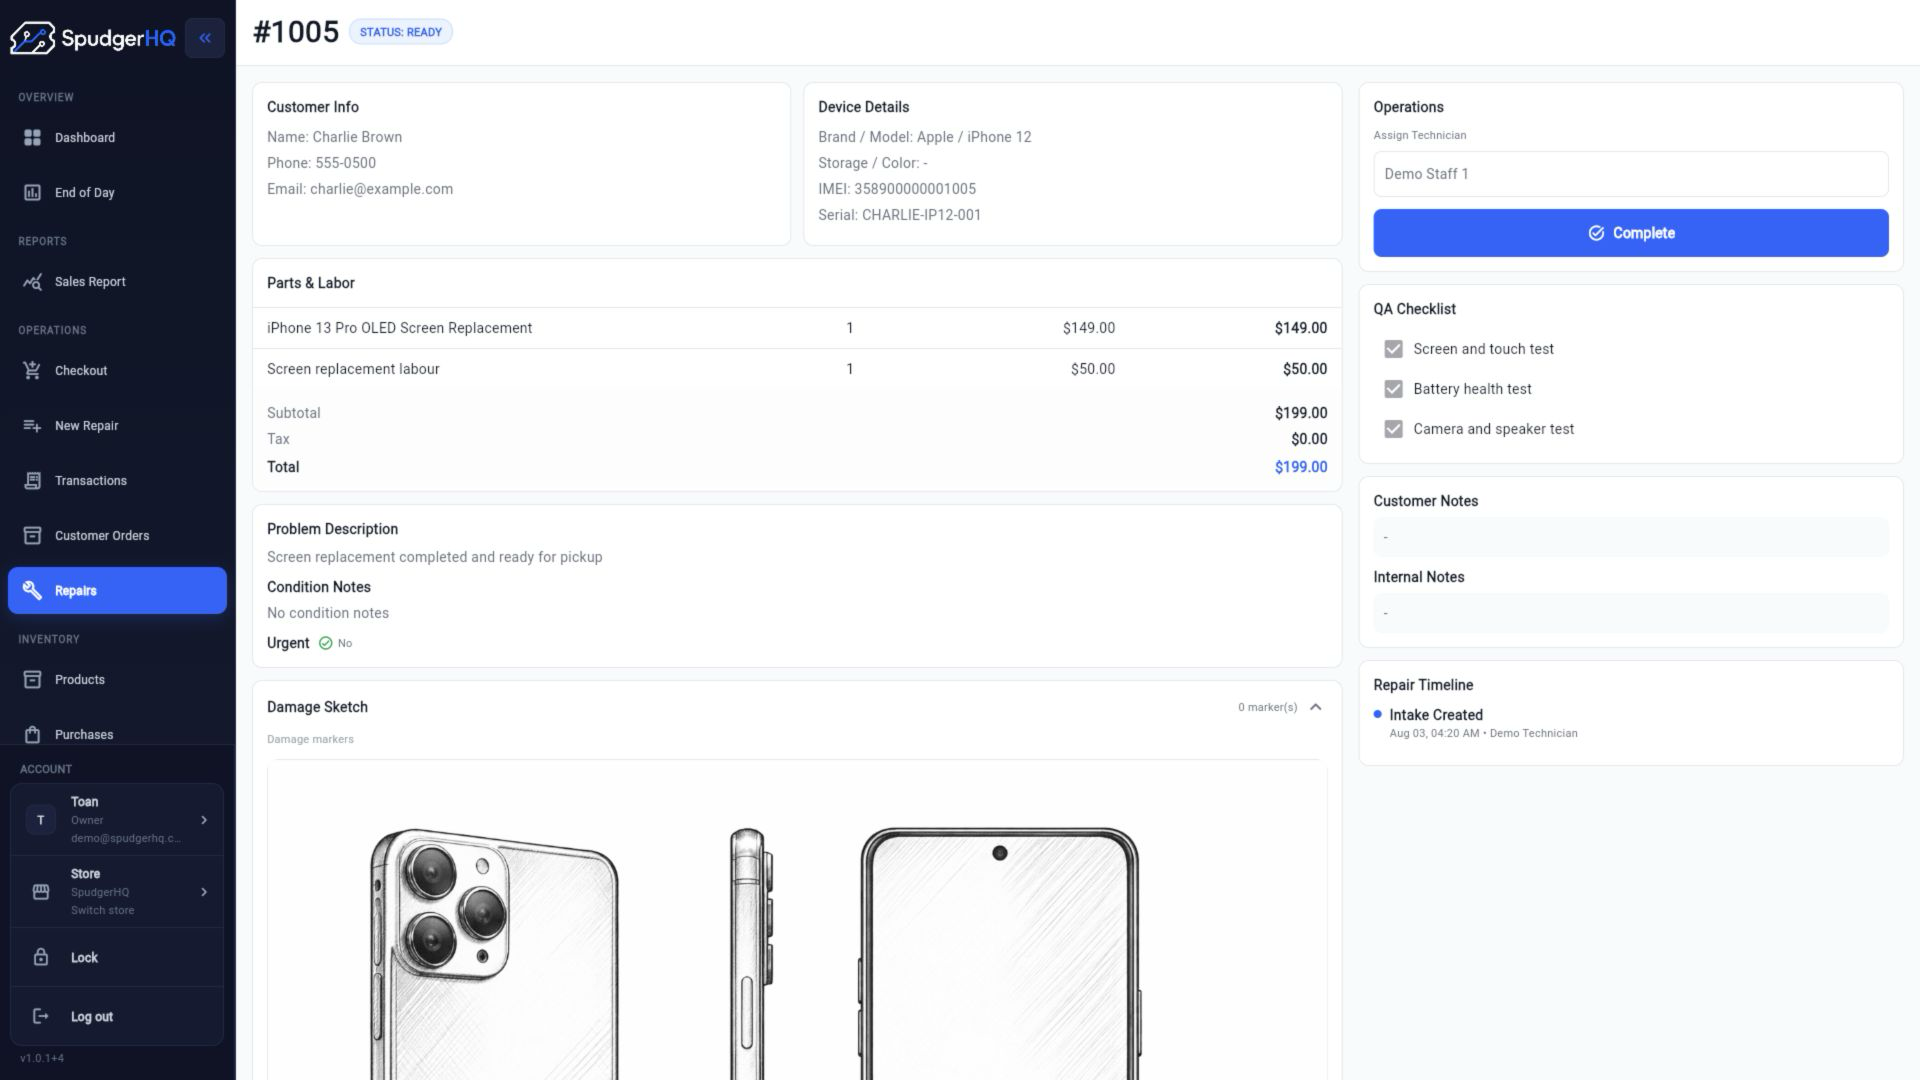
Open the repair detail or edit flow, choose the technician from the available staff list, and save the assignment.
- Open the repair detail.
- Choose Edit or the technician field.
- Select the technician and save.
How do I add repair parts and services?
Use the repair line-item actions to add stocked parts and service products, then review the repair estimate or total.
- Open the repair detail or edit page.
- Add the required parts and service lines.
- Review quantities, prices, and the updated repair total.
What does “waiting for parts” mean?
The repair is paused because one or more required parts are not yet available. Resolve the part requirement before moving the job forward.
How do I start or update a repair?
Open the repair detail, choose the next available status action, and save any technician notes or line-item changes before leaving the page.
- Open Repairs and select the job.
- Review the current status and available action.
- Update the status or details and save.
How do I complete QA checks?
Needs verificationOpen the reachable QA section from the repair workflow, complete the checks exposed for the job, and save the result before marking the repair ready.
- Open the repair detail after the work is complete.
- Review the available QA checks.
- Complete and save the checks, then continue to Ready when eligible.
How do I mark a repair ready?
After the repair work and reachable QA checks are complete, use the Ready action from the repair detail.
- Open the repair detail.
- Confirm required work, parts, and QA are complete.
- Choose Mark Ready and save.
How do I collect payment for a repair?
Use the payment action from the repair detail or checkout handoff, review the repair total, and complete the payment.
- Open the repair detail.
- Choose Collect Payment.
- Select the payment method, confirm the amount, and complete the transaction.
How do I print a repair invoice or ticket?
Needs verificationUse the print action exposed by a reachable repair entry point after reviewing the ticket or invoice details.
- Open the repair detail.
- Choose Print Invoice or Print Ticket when available.
- Follow the browser or platform print dialog.
How do I cancel or delete a repair?
Needs verificationOpen an eligible repair, choose the available cancellation or deletion action, provide any requested reason, and confirm.
- Open the repair detail.
- Review the current status and available destructive actions.
- Confirm the action only after checking that the job should no longer continue.
Keep this context in mind
- Repair intake is the starting point for the repair job and its customer/device context.
- Waiting for parts means the job cannot continue until the required part availability is resolved.
- Contract and contract-template routes currently redirect to Repairs and are not standalone active workflows.
Talk to the SpudgerHQ team.
Tell us what you expected to see and which workflow you were trying to complete.