
The repair shop intake process at a glance
Use one repeatable sequence from the first customer conversation to a Repair that is ready for the bench.
Start by identifying the customer and the exact device. Record what the customer reports separately from what staff can observe, document pre-existing condition, and capture IMEI or serial details when they help identify the device. Add the notes, expected parts or services, stock context, owner, urgency, and expected completion that the job needs. Then review scope and approval with the customer before creating and handing off the Repair.
Intake should preserve facts and expectations; it should not turn a front-desk assumption into a diagnosis. The technician receives what is known, what remains unverified, and what decision comes next.
- Identify the customer
- Identify the Customer Device
- Record the customer-reported issue
- Document condition and pre-existing damage
- Confirm IMEI, serial number, and relevant device details
- Separate customer-facing notes from internal notes
- Add likely Parts & Services and check stock when useful
- Set technician ownership, urgency, and expected completion
- Review scope, approval, and signature requirements
- Create the Repair and confirm the technician handoff
Identify who owns the device and which device is on the counter
The repair must be traceable even when several similar phones are in the shop.
Confirm the customer's name and a current contact method. If another person may approve work or collect the device, record that according to shop policy. Search for an existing record before creating a duplicate; use a walk-in path only when the shop does not need a saved customer record.
Record brand, exact model, storage, color, and accessories left with the device where relevant. Reuse a saved Customer Device when it is the same physical device. Otherwise, create a new device record rather than overwriting the identity of an older one.
Record the reported problem, current condition, and identifiers
These are different kinds of evidence and should not be collapsed into one vague note.
Write the customer's symptom in observable language: what happens, when it happens, how often, and what happened before it began. For example, ‘Customer reports touch stops responding near the top edge after a drop’ is more useful than either ‘broken phone’ or an unverified ‘digitizer failure.’
Inspect the screen, frame, back glass, cameras, ports, buttons, and power state. Note cracks, dents, missing pieces, bends, prior repair signs, corrosion, or visible liquid indicators when relevant. Use neutral measurements and locations—such as ‘20 mm crack from lower-right corner’—and review notable damage with the customer.
Record IMEI or serial number when it is appropriate for the shop's process and useful for distinguishing the device. Verify the characters from the device or system source rather than guessing from a handwritten label, and handle identifiers as sensitive customer data.
For field-level examples, use the guide to condition notes for phone repair intake.
Separate customer-facing notes from internal notes
One note should explain what the customer needs to know; the other should help staff operate the job.
Customer notes should use plain language and cover relevant expectations: the reported issue, agreed contact method, estimate or diagnostic boundary, expected timing, approved scope, and anything the customer needs to review. Avoid shop shorthand that could confuse someone reading an agreement or update.
Internal notes should hold shop-only reminders and technical context, such as an intermittent symptom to reproduce, an access limitation, a suspected part to verify, an unusual disassembly risk, or a question for the technician. Do not hide a customer promise only in an internal note.
Check parts, ownership, priority, and timing before the handoff
Add operational context only when it is supported by the intake conversation and current shop information.
Add the Parts & Services that are already known or reasonably expected, but distinguish an estimate from approved work and a likely part from a technician-confirmed requirement. Check stock availability before promising a same-day completion that depends on a part being present.
Assign a technician during intake when the shop uses named ownership, skill routing, or workload balancing. Otherwise, place the Repair in a clearly owned queue. Use an urgent flag for a defined operational reason—not simply because every customer would prefer faster service.
Discuss expected completion as a realistic target or window. Explain what may change it, such as diagnosis, approval, parts availability, or device condition. Avoid turning a preliminary expectation into an unconditional promise.
Fit approval and signature into the intake handoff
The customer should understand what the shop may do next before the device leaves the counter.
Review the device identity, notable condition, requested work, estimate or diagnostic terms, spending limit if used, expected timing, data or passcode handling, and the method for approving a change. Record which work may begin and which decisions require another customer response.
If the shop uses a Repair Agreement, prepare it only after the current Repair details are accurate. Give the customer a chance to review the condition record and terms before signing. Later scope changes may require a new approval or updated agreement rather than silently changing the original understanding.
Approval wording and signature requirements vary by service and location. Use shop-specific terms reviewed by a qualified adviser rather than treating a generic checklist as universal legal language. For the operational decision points, see the customer approval workflow for phone repair.
What must be true before the customer leaves
A completed intake gives the customer a clear next step and gives the technician a Repair that can be acted on without reconstructing the conversation.
Read back the most important details with the customer: device, reported issue, visible condition, accessories, approved next action, contact method, and timing expectation. Then make sure the technician or repair queue can see the same information.
Common repair intake mistakes
Most failures begin with an ambiguous fact, a missing expectation, or a handoff that exists only in memory.
Example: cracked-screen intake before the bench
This fictional example stops at the handoff so the intake process stays distinct from diagnosis and the full repair lifecycle.
How repair intake software supports the process
Software is useful when it carries the intake into repair work without replacing staff policy or judgment.
SpudgerHQ can connect an existing or walk-in customer, a saved or new Customer Device, brand, model, IMEI or serial number, condition, issue, customer and internal notes, technician assignment, urgency, expected completion, Parts & Services, stock availability, Damage Sketch, and a versioned Repair Agreement in one Repair Intake.
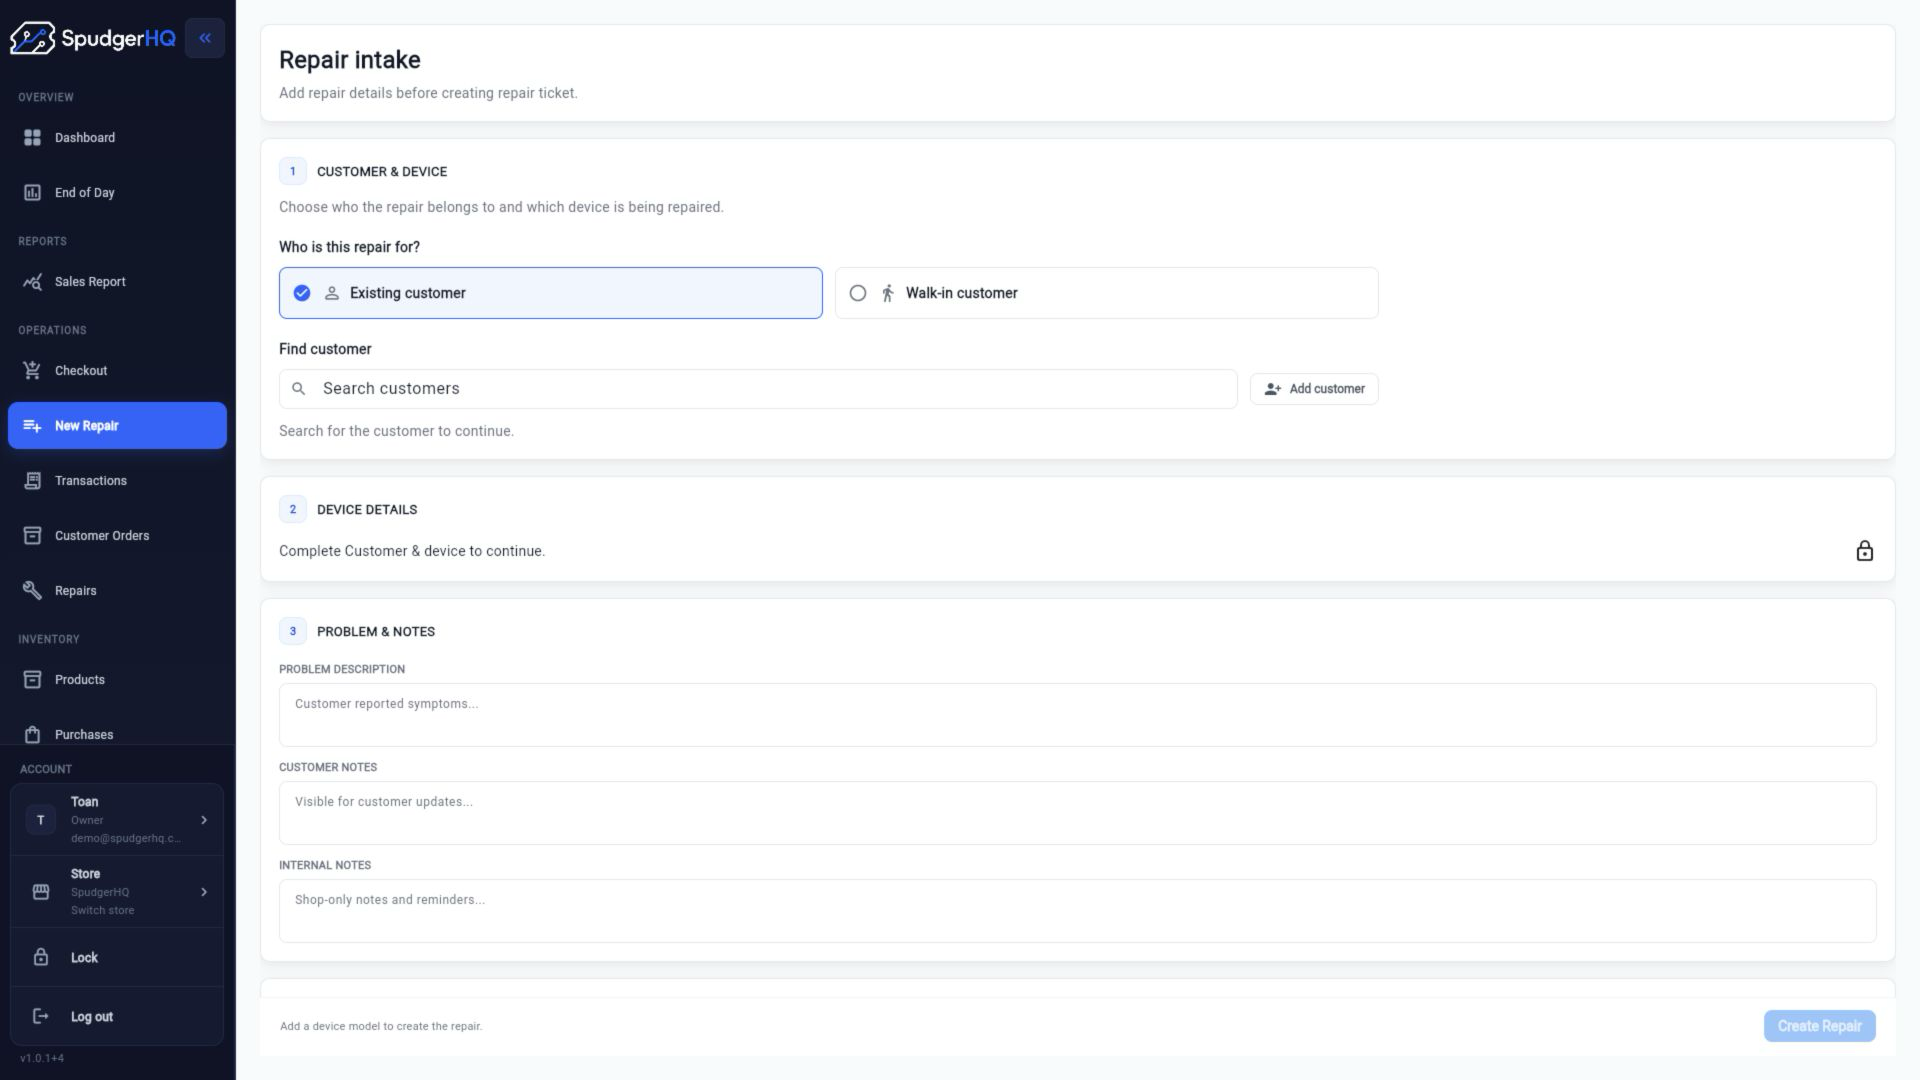
See how SpudgerHQ turns intake into a usable Repair
Review the product workflow for customer and device records, condition, notes, Parts & Services, assignment, timing, approval, and technician handoff.
Use the intake resource that matches the job
Phone repair intake checklist
A field-by-field counter checklist and printable reference.
Read Phone repair intake checklistSpeed up repair intake
Reduce avoidable delays without dropping essential detail.
Read Speed up repair intakeRepair intake form generator
Create a standalone form or template for a paper or digital process.
Read Repair intake form generatorQuestions about the repair shop intake process
These answers cover the operating process rather than software purchasing decisions.
What information should a repair shop collect at intake?
Collect enough information to identify the customer and exact device, preserve the reported issue, record pre-existing condition and accessories, separate customer and internal notes, show known Parts & Services and stock constraints, set ownership and timing, and document the approved next step.
Should a repair shop record the IMEI or serial number?
Record IMEI or serial number when it is appropriate for the shop's process and helps identify the device. Verify it from a reliable device or system source, avoid guessing from handwriting, and handle it as sensitive customer information.
How should pre-existing damage be documented?
Use neutral, specific condition notes that name the damaged area, location, size or extent, and relevant power state. A visual damage sketch can add context. Review notable damage with the customer before the device leaves the counter.
When should customer approval happen during repair intake?
Before work begins, confirm the approved next action, estimate or diagnostic boundary, spending limit if used, expected timing, data or access expectations, and how later scope changes will be approved. Complete any required agreement or signature after the current repair details are accurate.